
Pinterest remains one of the most powerful traffic-driving platforms for bloggers in 2026, with its visual search engine continuing to deliver exceptional referral traffic and long-term content visibility. Unlike other social platforms, Pinterest’s unique position as a discovery engine means your content can continue attracting visitors months or even years after publication. Our comprehensive guide walks you through the exact process of setting up a Pinterest business account optimized for blogging success.
The Pinterest landscape has evolved significantly in 2026, with new features, algorithm updates, and best practices that bloggers must understand to maximize their results. A properly configured business account provides access to essential analytics, advertising options, and features that personal accounts lack. This guide will help you establish a solid foundation for your Pinterest presence that drives consistent traffic to your blog.
Table of Contents
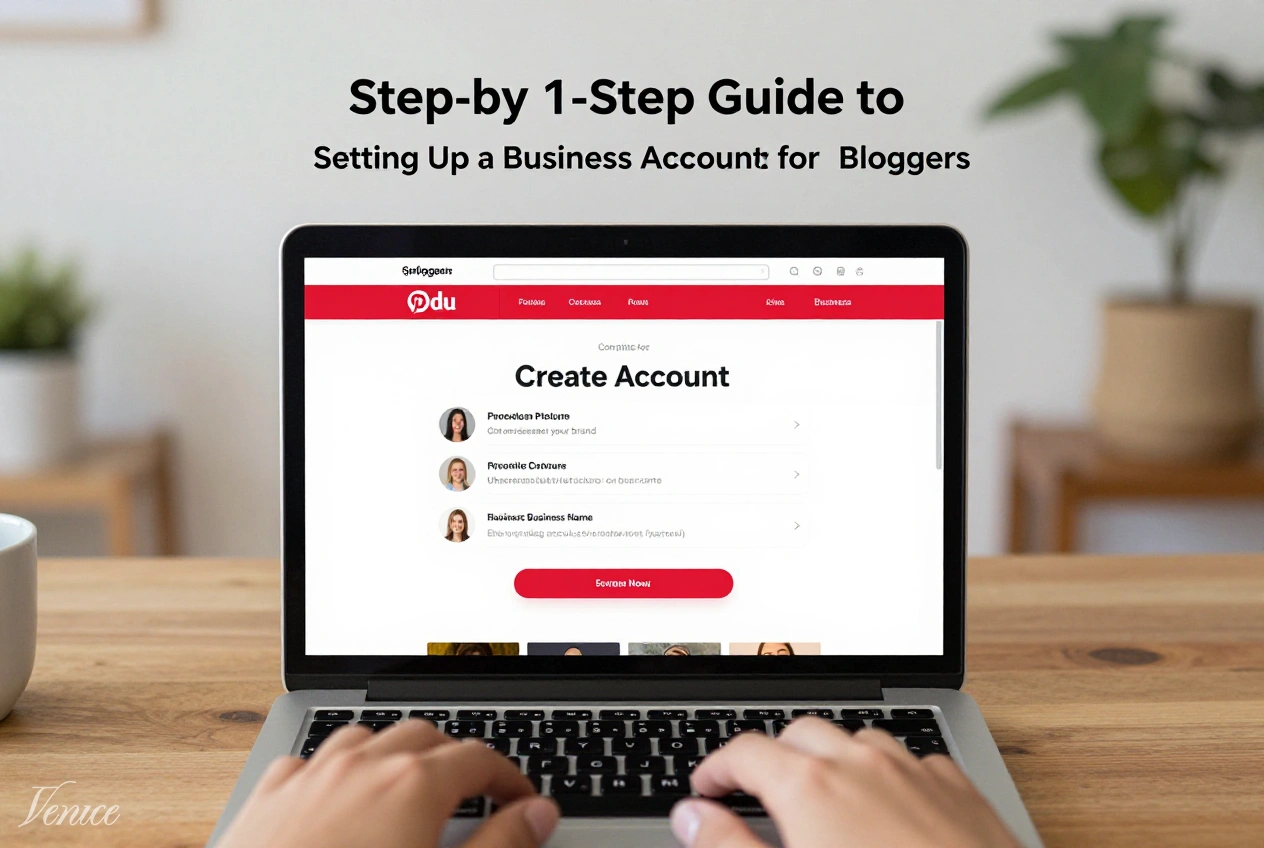
Step 1: Creating Your Pinterest Business Account
Choose the Right Account Type
Begin by visiting business.pinterest.com and clicking “Create Account.” Select “Business” as your account type to access essential features including analytics, rich pins, and the Pinterest tag. If you already have a personal Pinterest account, you can convert it to a business account without losing your existing pins and followers.
During setup, you’ll be asked to provide basic business information including your business name, website, and business category. For bloggers, select “Blogger” or “Content Creator” as your business category to ensure proper categorization within Pinterest’s directory.
Claim Your Website
Claiming your website is crucial for establishing ownership and accessing analytics data. Navigate to Settings > Claim > Claim Website. Pinterest offers three verification methods: adding an HTML meta tag to your blog’s header, uploading an HTML file to your server, or adding a DNS TXT record.
The HTML meta tag method is typically easiest for bloggers using WordPress. Simply copy the provided meta tag and add it to your theme’s header.php file or through a plugin like Yoast SEO or All in One SEO Pack. Verification usually takes 24-48 hours, after which you’ll see a checkmark next to your website on your profile.
Enable Business Features
Once your account is created, navigate to Settings > Account Settings and ensure all business features are enabled. Turn on “Complete profile” to receive guidance on optimizing your account, and enable “Show profile in search results” to increase discoverability.
Additionally, enable “Taste profile” under Settings > Account > Taste Profile to help Pinterest understand your content preferences and improve recommendations. This feature helps Pinterest’s algorithm better categorize your content and show it to relevant users.
Step 2: Optimizing Your Profile for Maximum Visibility
Craft a Keyword-Rich Profile Name
Your profile name should include your blog name plus your primary niche or topic. For example, “Travel with Sarah | Budget Travel Tips” rather than just “Travel with Sarah.” This helps Pinterest understand your content focus and improves your visibility in search results.
Keep your profile name under 30 characters to ensure it displays fully on all devices. Avoid using special characters or excessive emojis in your name, as these can appear unprofessional and may impact search visibility.
Write a Compelling Bio
Your bio should clearly communicate who you are, what you blog about, and what value you provide to your audience. Include relevant keywords naturally throughout your bio to improve search visibility. Structure your bio with this formula: [Who you help] + [What you help them achieve] + [How you help them].
Include a call-to-action that directs visitors to your blog or a specific resource. For example: “Helping busy families create memorable vacations on a budget. Get my free travel planning guide at [yourblog.com/guide].” Your bio should be 160 characters or less to ensure it displays fully in search results.
Optimize Your Profile Picture
Use a high-quality, professional headshot as your profile picture. The image should be clear, well-lit, and feature you facing forward with a friendly expression. Your face should occupy approximately 60-70% of the frame to ensure it remains recognizable when displayed as a small circle.
Avoid using logos, text, or group photos as your profile picture, as these don’t create the personal connection that performs best on Pinterest. Ensure your profile picture matches across all your social media platforms for brand consistency.
Add Your Board Covers
Create custom board covers that match your brand aesthetic and clearly communicate each board’s topic. Use consistent fonts, colors, and styling across all board covers to create a cohesive look. Include your blog name or logo subtly in each board cover for brand recognition.
Design your board covers at 217 x 147 pixels for optimal display. Use tools like Canva to create professional-looking board covers even without design experience. Update your board covers quarterly to refresh your profile’s appearance while maintaining brand consistency.
Step 3: Setting Up Rich Pins and Analytics
Enable Rich Pins
Rich Pins automatically sync information from your website to your pins, ensuring they always display the most current data. For bloggers, Article Rich Pins are particularly valuable as they display your blog post title, description, and author information directly on the pin.
To enable Rich Pins, you’ll need to add Open Graph or Schema.org markup to your blog. Most WordPress themes include this functionality automatically, but you can verify using Pinterest’s Rich Pin validator. Once your markup is properly implemented, apply for Rich Pins through Pinterest’s developer portal.
Install the Pinterest Tag
The Pinterest Tag is a piece of code that helps you track conversions from your Pinterest traffic. Install the base tag on all pages of your blog, then add event tracking for specific actions like page views, add to carts, and purchases.
If you’re using WordPress, plugins like Pinterest Tag Manager or GTM4WP simplify the installation process. The Pinterest Tag provides valuable data on how users interact with your blog after clicking through from Pinterest, helping you optimize your strategy.
Configure Analytics Dashboard
Customize your Pinterest Analytics dashboard to focus on metrics most relevant to bloggers. Key metrics to monitor include Impressions, Engagements, Clicks, and Outbound Clicks. Set up custom date ranges to track performance over specific periods.
Create regularly scheduled reports to track your growth over time. Pay special attention to the Audience Insights tab, which provides valuable demographic information about your Pinterest audience and their interests.
Step 4: Creating an Effective Board Structure
Develop a Strategic Board Framework
Create boards that align with your blog’s content categories and your audience’s interests. Start with 10-15 boards covering your main topics, then expand as your content library grows. Include a mix of broad topic boards and niche-specific boards to capture different search intents.
Structure your boards with a logical hierarchy, placing your most important boards at the top of your profile. Consider creating boards for each blog post category, seasonal content, and specific audience segments.
Optimize Board Titles and Descriptions
Use keyword-rich titles that clearly describe each board’s content. Include your primary keywords at the beginning of board titles for better search visibility. For example, “Budget Travel Tips” rather than “Travel Ideas.”
Write detailed board descriptions (up to 500 characters) that explain what type of content users will find. Include relevant keywords naturally throughout your descriptions. Add a call-to-action in your most important boards directing users to your blog for related content.
Organize Pins Within Boards
Arrange pins within each board to prioritize your most recent and important content. Place your newest blog post pins at the top of relevant boards, as Pinterest shows the first few pins when users browse your boards.
Consider creating sections within larger boards to organize content by subtopics. This helps users find specific content more easily and improves the overall user experience on your profile.
Step 5: Developing a Pin Creation Strategy
Design Click-Worthy Pin Templates
Create 3-5 pin templates that match your brand aesthetic while standing out in the feed. Design vertical pins with a 2:3 aspect ratio (1000 x 1500 pixels) for optimal display. Use high-quality images, clear typography, and brand colors consistently across all templates.
Include your blog name or logo subtly on each pin for brand recognition. Design templates with different layouts to test which performs best with your audience. Tools like Canva, PicMonkey, or Adobe Express make it easy to create professional-looking pins even without design experience.
Write Compelling Pin Descriptions
Craft pin descriptions that provide value while incorporating relevant keywords. Start with a hook that grabs attention, followed by a brief explanation of what users will find when they click through to your blog. Include a call-to-action encouraging users to click, save, or follow.
Use all 500 characters available in pin descriptions, but avoid keyword stuffing. Add 2-5 relevant hashtags at the end of your description to increase discoverability. Focus on providing genuine value in your descriptions rather than simply promoting your content.
Implement a Consistent Pinning Schedule
Pin consistently using a scheduler like Tailwind, Buffer, or Pinterest’s native scheduling tool. Aim to pin 5-15 times daily, spreading your pins throughout optimal times when your audience is most active. Focus on quality over quantity, ensuring each pin provides value to your target audience.
Create a content mix that includes your own blog posts (80%), relevant content from others (15%), and seasonal or trending content (5%). This balance demonstrates that you’re a valuable resource rather than simply self-promoting.
Step 6: Monitoring and Optimizing Performance
Track Key Performance Metrics
Regularly review your Pinterest Analytics to identify which pins, boards, and strategies are driving the most traffic to your blog. Focus on metrics like Impressions, Engagements, Clicks, and Outbound Clicks to understand how users are interacting with your content.
Set up monthly performance reports to track your growth over time. Pay special attention to seasonal trends and adjust your content strategy accordingly. Use the data to identify your most successful content types and create more of what resonates with your audience.
A/B Test Pin Elements
Experiment with different pin elements to optimize performance. Test different images, headlines, colors, and formats to identify what resonates best with your audience. Create multiple pins for each blog post to test which designs drive the most clicks.
Track your test results in a simple spreadsheet, noting which elements perform best. Apply your learnings to future pin creation while continuing to test new approaches to continuously improve your results.
Frequently Asked Questions
If you have an established personal account with followers and boards, converting to a business account is typically the better option. You’ll retain your existing followers, pins, and boards while gaining access to business features. However, if your personal account contains mostly personal content unrelated to your blog, starting fresh with a business account focused solely on your blog content may be more effective.
Begin with 10-15 boards covering your main blog categories and audience interests. It’s better to start with fewer, well-maintained boards than many empty ones. You can always create additional boards as your content library grows. Focus on quality over quantity, ensuring each board has at least 10-20 high-quality pins before creating new ones.
While you can use a personal account as a blogger, a business account provides essential features for serious content creators. Business accounts offer analytics, rich pins, website verification, and advertising options that personal accounts lack. These features are crucial for tracking your performance and optimizing your strategy to drive traffic to your blog.
Consistency is more important than frequency when it comes to pinning. Most successful bloggers pin 5-15 times daily using a scheduler to maintain consistency. Focus on quality over quantity, ensuring each pin provides value to your target audience. It typically takes 3-6 months of consistent pinning to see significant traffic results from Pinterest.
Enabling comments on your pins can increase engagement and provide valuable feedback from your audience. However, it also requires monitoring to prevent spam. If you have the time to moderate comments, enabling them can be beneficial. If not, you can disable comments while still allowing users to save and engage with your pins in other ways.
Pinterest advertising can be effective for bloggers once you have a solid organic strategy in place. Start by optimizing your account and pinning consistently for 3-6 months before considering paid promotion. When you do advertise, focus on promoting your best-performing pins to amplify their reach. Begin with a small budget (\$5-10 per day) to test results before scaling up.
Conclusion
Setting up a Pinterest business account properly is essential for bloggers looking to drive consistent traffic to their content. By following the step-by-step process outlined in our guide, you’ll establish a solid foundation that maximizes your visibility on the platform and creates a sustainable source of referral traffic for your blog.
Remember that Pinterest success requires consistency and patience—results typically build gradually over 3-6 months of strategic pinning. Focus on providing genuine value to your audience through high-quality pins and thoughtful organization rather than simply promoting your content. This value-first approach aligns with Pinterest’s algorithm and user expectations, leading to better long-term results.
Implement the steps outlined in this guide systematically, monitor your performance regularly, and refine your strategy based on data and audience feedback. With a properly configured business account and strategic approach to content creation, Pinterest can become one of your most valuable traffic sources for years to come.